Next.Js -Installation and setup
Introduction
Getting started with a new technology can be an exciting but sometimes daunting experience. In the ever-evolving world of web development, Next.js has emerged as a powerful and versatile framework for building web applications. will walk you through the process of getting started with Next.js, from installation and setup to creating your first Next.js app. We’ll also delve into the folder structure and conventions that make Next.js development efficient and organized.
Installation and Setup
Before you can embark on your Next.js journey, you need to install it and set up your development environment. The following steps will guide you through the process.
1. Prerequisites
Before you dive into Next.js, make sure you have Node.js and npm (Node Package Manager) installed on your system. You can download and install them from the official Node.js website (https://nodejs.org/).
2. Creating a New Next.js Project
To create a new Next.js project, you can use the create-next-app command-line tool, which simplifies the setup process. Open your terminal and run the following command:
npx create-next-app my-nextjs-appCode language: Bash (bash)Replace my-nextjs-app with the desired name of your project. This command will set up a new Next.js project in a folder with the provided name.
3. Navigating to Your Project
Once the project is created, navigate to its directory using the cd command:
cd my-nextjs-appCode language: Bash (bash)4. Running Your Next.js App
You can now start your Next.js app by running the following command:
npm run devCode language: Bash (bash)This command will launch a development server, and you can access your Next.js app by opening a web browser and visiting http://localhost:3000.
Creating Your First Next.js App
With your Next.js project set up and running, it’s time to create your first app. Let’s start by understanding the basic file structure and conventions.
1. File Structure
Next.js follows a well-organized file structure that keeps your codebase clean and maintainable. Here are some key directories and files you’ll encounter:
pages: This directory contains your application’s pages. Each JavaScript file in this directory represents a route in your app.public: You can place static assets like images, fonts, and other resources in this directory.styles: If you’re using CSS or CSS-in-JS, you can organize your styles here.components: This directory is meant for reusable React components.
2. Creating Your First Page
In Next.js, each JavaScript file in the pages directory becomes a route. Let’s create your first page by following these steps:
- Inside the
pagesdirectory, create a new JavaScript file namedindex.js. - Open the
index.jsfile in your preferred code editor. - Start by importing React and any other components you need:
import React from 'react';Code language: JavaScript (javascript)- Create a functional React component for your page. For example:
function HomePage() {
  return (
    <div>
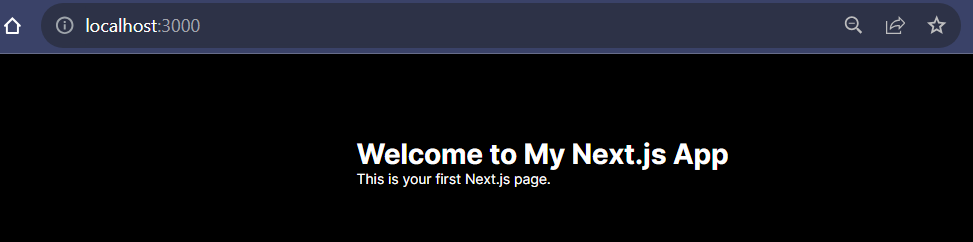
      <h1>Welcome to My Next.js App</h1>
      <p>This is your first Next.js page.</p>
    </div>
  );
}

export default HomePage;Code language: TypeScript (typescript)
Output:
- Save the file.
3. Accessing Your First Page
With your index.js file in place, you can access your first page by navigating to http://localhost:3000 in your web browser. You’ll see the content you added to the HomePage component displayed in your app.
Folder Structure and Conventions
As you continue your journey with Next.js, you’ll find that the framework’s folder structure and conventions contribute to a smooth development experience. Here are some conventions to keep in mind:
- Each route is defined by a JavaScript file in the
pagesdirectory. For example,pages/about.jsrepresents the “About” page. - To create dynamic routes, you can use square brackets, such as
pages/posts/[id].js, where[id]can be any dynamic parameter. - The
publicdirectory is used for static assets, making it easy to reference them in your components. - Next.js provides a CSS module system, allowing you to create scoped CSS styles in your components. Stylesheets with the
.module.cssextension are automatically scoped to the component that imports them. - By following these conventions and leveraging the organized file structure, you’ll maintain a clean and structured codebase.
Conclusion
Getting started with Next.js is a straightforward process, and this guide has provided you with the essential steps to set up your development environment, create your first Next.js app, and understand the framework’s folder structure and conventions. As you continue your journey with Next.js, you’ll explore its rich features, such as server-side rendering, dynamic routing, and optimized performance.
By adhering to Next.js conventions and taking advantage of its organized file structure, you’ll be well on your way to building efficient and maintainable web applications. Next.js empowers you to create modern web experiences with ease, making it an invaluable addition to your web development toolkit. Happy coding!
Related posts:

Powered by YARPP.