Routing and Navigation
Introduction :
In the world landscape of web development, Next.js has appear as a powerful framework for building React applications. One of its key features is client-side routing, which enables seamless navigation between pages. we’ll dive into the intricate of client-side routing using the Next.js Link component, explore strategies for route protection and authorization, and discuss navigation techniques and best practices.
Client-Side Routing with Next.js Link Component:
Understanding Client-Side Routing:
Client-side routing is a technique that allows web applications to update the URL and content of a page without requesting a new page from the server. This results in faster transitions between pages and a more responsive user interface. Next.js simplifies client-side routing through the use of the Link component.
Using the Link Component in Next.js:
The Link component in Next.js is part of the next/link module and is designed to easy client-side navigation. It works by pre-fetching linked pages in the background, ensuring that the transition between pages is swift and seamless. Let’s delve into a basic example to illustrate the usage of the Link component.
// AboutPage
import React from 'react'
const AboutPage = () => {
return (
<div>
<h2>This is About Page</h2>
</div>
)
}
export default AboutPage;
Code language: JavaScript (javascript)// BlogPage
import React from 'react'
const BlogPage = () => {
return (
<div>
<h2>This is Blog Page</h2>
</div>
)
}
export default BlogPage
Code language: JavaScript (javascript)// Import the Link component from next/link
import Link from 'next/link';
// Create a simple component with the Link component
const NavigationMenu = () => {
return (
<nav>
{/* Utilize the Link component to navigate to different pages */}
<Link href="/">
<a>Home</a>
</Link>
<Link href="/about">
<a>About</a>
</Link>
<Link href="/blog">
<a>Blog</a>
</Link>
</nav>
);
};
export default NavigationMenu;
Code language: HTML, XML (xml)// Home
import NavigationMenu from "./NavigationMenu";
export default function Home() {
return (
<>
<h1>This is Home page</h1>
<NavigationMenu/>
</>
)
}
Code language: JavaScript (javascript)Output :
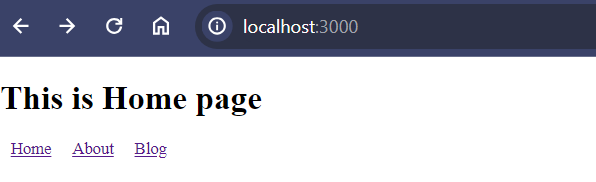
In this example, we’ve created a NavigationMenu component that uses the Link component to create links for the “Home,” “About,” and “Blog” pages. When a user clicks on one of these links, Next.js will seamlessly handle the navigation, providing a smoother and more enjoyable user experience.
Benefits of Client-Side Routing with Link:
- Faster Page Transitions: Client-side routing eliminates the need for full page reloads, resulting in faster transitions between pages.
- Improved User Experience: The seamless navigation provided by the
Linkcomponent contributes to an overall improved user experience, making the web application feel more responsive and dynamic. - Efficient Pre-fetching: Next.js intelligently pre-fetches linked pages in the background, optimizing performance by loading resources before they are actually needed.
Incorporating client-side routing into your Next.js applications using the Link component is a straightforward yet impactful way to enhance user experience. By providing faster page transitions and efficient pre-fetching, the Link component authorize developers to create web applications that feel both responsive and polished. As you take off on your journey of building with Next.js, consider leveraging the Link component to unlock the full potential of client-side routing.
Route protection and authorization :
Building a secure and strong web application involves not only creating compelling features but also ensuring that sensitive routes are protected from unauthorized access. In the world of Next.js, route protection and authorization are crucial feature of web development.
1. Understanding Route Protection:
Route protection involves restricting access to certain pages or routes within your web application. This is crucial for protecting sensitive information, user accounts, and any other confidential data. Next.js offers several mechanisms to implement route protection effectively.
2. Client-Side vs. Server-Side Protection :
Next.js supports both client-side and server-side route protection. Client-side protection involves checking and restricting access on the client’s browser, while server-side protection occurs on the server before rendering the page. The choice between the two depends on the specific security requirements of your application.
3. Utilizing Next.js getServerSideProps:
One effective server-side approach is to use the getServerSideProps function provided by Next.js. This function runs on every request, allowing you to perform server-side logic, including authorization checks, before rendering the page.
// Example of using getServerSideProps for route protection
export async function getServerSideProps(context) {
  // Perform authorization check based on the context object
  const isAuthenticated = checkUserAuthentication(context);

  // If the user is not authenticated, redirect to the login page
  if (!isAuthenticated) {
    return {
      redirect: {
        destination: '/login',
        permanent: false,
      },
    };
  }

  // Fetch data to be passed to the page
  const data = await fetchData();

  // Return data to be used as props in the component
  return {
    props: { data },
  };
}

// Your protected component
function ProtectedPage({ data }) {
  // Component logic goes here
}
Code language: HTML, XML (xml)
4. Authentication Middleware for Server-Side Protection:
Implementing authentication middleware is another powerful way to protect routes on the server side. This middleware can be applied to specific routes, checking user authentication before allowing access.
// Example of server-side route protection using middleware
function requireAuth(req, res, next) {
  // Check user authentication
  if (userIsAuthenticated(req)) {
    return next(); // Allow access to the route
  }

  // If not authenticated, redirect to the login page
  res.redirect('/login');
}

// Apply the middleware to a protected route
app.get('/protected-route', requireAuth, (req, res) => {
  // Route logic goes here
});
Code language: HTML, XML (xml)
5. Conditional Rendering on the Client Side:
For client-side protection, conditionally rendering components based on the user’s authentication status is a common approach. This ensures that certain parts of your application are only accessible to authenticated users.
// Example of conditional rendering based on authentication status
function MyApp({ user }) {
  return (
    <div>
      {user ? (
        // Authenticated user views this content
        <AuthenticatedContent />
      ) : (
        // Non-authenticated user sees a different view or a login prompt
        <LoginPrompt />
      )}
    </div>
  );
}
Code language: JavaScript (javascript)
6. Role-Based Authorization:
Beyond basic authentication, role-based authorization allows you to restrict access to specific routes based on a user’s role. This is especially useful in applications with different user roles, such as admin or regular user.
// Example of role-based authorization
function AdminDashboard() {
  const user = getCurrentUser();

  // Check if the user has admin role
  if (user && user.role === 'admin') {
    return <AdminContent />;
  } else {
    // Redirect or show an unauthorized message
    return <UnauthorizedMessage />;
  }
}
Code language: HTML, XML (xml)
Route protection and authorization are paramount in ensuring the security of your Next.js application. By leveraging server-side functions like getServerSideProps, authentication middleware, and client-side conditional rendering, you can create a robust defense against unauthorized access. Whether it’s protecting sensitive data or controlling access based on user roles, implementing these strategies will contribute to a more secure and trustworthy web application. Always prioritize security in your development process to build a web application that users can trust with their valuable information.
Navigation techniques and best practices.
1. Clear and Concise Menus:
Menus serve as the roadmap for users, guiding them through the content on your website. Keep menus clear, concise, and logically organized. Group related items together and use descriptive labels that convey the purpose of each section. Avoid overwhelming users with too many menu options; simplicity is key.
<nav>
  <ul>
    <li><a href="/">Home</a></li>
    <li><a href="/about">About Us</a></li>
    <li><a href="/services">Services</a></li>
    <li><a href="/blog">Blog</a></li>
    <li><a href="/contact">Contact</a></li>
  </ul>
</nav>
Code language: HTML, XML (xml)
2. Responsive Design for Mobile Users:
In the era of smartphones, ensuring a seamless experience across devices is crucial. Implement responsive design to adapt your navigation for mobile users. Consider using a hamburger menu or other mobile-friendly navigation patterns to conserve screen space while maintaining accessibility.
<!-- Example of a responsive navigation menu -->
<div class="menu-toggle">
<input type="checkbox" id="menu-btn">
<label for="menu-btn">☰ Menu</label>
<nav>
<ul>
<!-- Menu items go here -->
</ul>
</nav>
</div>
Code language: HTML, XML (xml)3. Breadcrumb Navigation:
Breadcrumb trails provide users with a hierarchical path back to the homepage, helping them understand their location within the site. This is especially valuable for complex websites with deep content structures.
<!-- Example of breadcrumb navigation -->
<div class="breadcrumbs">
  <a href="/">Home</a> > <a href="/category">Category</a> > Current Page
</div>
Code language: HTML, XML (xml)
4. Consistent Navigation Across Pages:
Consistency breeds familiarity. Maintain a consistent navigation structure across all pages of your website. Users should not have to re-learn how to navigate when moving from one section to another.
5. Interactive and Intuitive Navigation Elements:
Enhance user engagement by incorporating interactive and intuitive navigation elements. Consider using mega-menus, hover effects, or subtle animations to make navigation more engaging without sacrificing simplicity.
6. Search Functionality:
A search bar is a powerful tool for users seeking specific content. Ensure your search functionality is prominently placed and provides relevant results. Autocomplete suggestions and filters can further refine the user’s search experience.
<!-- Example of a search bar -->
<form action="/search" method="get">
  <input type="text" name="q" placeholder="Search...">
  <button type="submit">Search</button>
</form>
Code language: HTML, XML (xml)
7. User Feedback and Confirmation:
When users perform actions like submitting forms or making purchases, provide clear feedback and confirmation messages. This reassures users that their interactions were successful, reducing uncertainty and frustration.
Navigating the web should be an intuitive and enjoyable experience for users. By implementing clear menus, responsive design, breadcrumb navigation, and other best practices, you can create a digital journey that is not only efficient but also engaging. Remember, the key is to prioritize the user’s needs and deliver a seamless navigation experience that enhances their overall satisfaction with your website.
Conclusion :
Next.js offers a robust framework for client-side routing, route protection, and navigation. By harnessing the power of the Link component, implementing route protection strategies, and adhering to navigation best practices, developers can create web applications that provide a seamless and secure user experience. As you embark on your Next.js journey, keep exploring the framework’s features and stay attuned to emerging best practices in the ever-evolving landscape of web development.
Related posts:

Powered by YARPP.