JavaScript -DOM Methods
Before we embark on our exploration of HTML DOM methods, it’s crucial to grasp the concept of the DOM itself. The Document Object Model is a hierarchical representation of a web page’s structure. Think of it as a tree-like structure, where each element, such as headings, paragraphs, images, and links, is represented as a node. These nodes are interconnected, forming a tree with a root node representing the entire web page.
The DOM tree serves as a structured representation of the web page’s content and hierarchy, providing developers with the means to interact with and manipulate it.
The Significance of HTML DOM Methods
HTML DOM methods, provided by JavaScript, are instrumental in web development for several reasons:
1. Accessing Elements: HTML DOM methods allow developers to select and access specific elements within the DOM tree. These methods act as a bridge, enabling JavaScript to interact with elements based on their IDs, classes, tag names, or other attributes.
2. Manipulating Content: Once elements are selected, HTML DOM methods empower developers to manipulate their content. This includes changing text, modifying HTML structure, updating attributes, and even adding or removing elements on the fly.
3. Enhancing Interactivity: With the ability to respond to user interactions, such as clicks, mouse movements, and keyboard inputs, HTML DOM methods enable the creation of interactive web applications. Event listeners, a key part of DOM manipulation, play a pivotal role in this interactivity.
4. Dynamic Updates: Web applications can dynamically update their content without the need for full page reloads. This real-time responsiveness enhances user experiences and keeps them engaged.
5. Cross-Browser Compatibility: HTML DOM methods provide a consistent way to interact with web content across various web browsers, ensuring that web applications work seamlessly for a wide audience.
Exploring Essential HTML DOM Methods
Let’s dive deeper into some of the fundamental HTML DOM methods and understand how they work:
1. getElementById(): This method allows you to select an element by its unique ID. For example, to select an element with the ID “myElement,” you can use:
const element = document.getElementById("myElement");Code language: JavaScript (javascript)This method is incredibly useful for targeting specific elements in your web page.
2. getElementsByClassName(): When you want to select elements by their class names, this method comes to the rescue. It returns a collection of elements with the specified class:
const elements = document.getElementsByClassName("myClass");Code language: JavaScript (javascript)This is handy when you have multiple elements with the same class.
3. getElementsByTagName(): If you need to select elements by their HTML tag names, this method is the solution. It returns a collection of elements with the specified tag:
const elements = document.getElementsByTagName("p");Code language: JavaScript (javascript)Use this method when you want to target all elements of a particular type.
4. querySelector(): This versatile method allows you to select the first element that matches a specified CSS selector. It’s highly flexible and can be used for complex selections:
const element = document.querySelector(".myClass");Code language: JavaScript (javascript)You can use CSS selectors to target elements precisely.
5. querySelectorAll(): Similar to querySelector(), this method returns all elements that match a specified CSS selector in a NodeList:
const elements = document.querySelectorAll("p.myClass");Code language: JavaScript (javascript)You can iterate through this NodeList to manipulate multiple elements simultaneously.
6. createElement(): When you need to create a new HTML element dynamically, this method is your ally. You can create the element, set its properties and attributes, and then append it to the DOM:
const newElement = document.createElement("div");Code language: JavaScript (javascript)This is especially useful when you want to build complex DOM structures on the fly.
7. appendChild(): After creating a new element, you can use this method to add it as a child of an existing element:
parentElement.appendChild(newElement);Code language: JavaScript (javascript)It’s a fundamental technique for building hierarchical structures in the DOM.
8. removeChild(): Conversely, when you need to remove a child element from its parent, this method comes into play:
parentElement.removeChild(childElement);Code language: JavaScript (javascript)It allows you to manage the DOM structure dynamically.
9. setAttribute(): This method is used to set or modify attributes of an HTML element. For example, you can change the source of an image dynamically:
element.setAttribute("src", "new-image.jpg");Code language: JavaScript (javascript)It’s crucial for altering the behavior and appearance of elements.
10. addEventListener(): To make your web page interactive, you’ll frequently use this method to listen for events on specific elements. When the event occurs, a defined function is executed:
element.addEventListener("click", function() {
    // Your code here
});Code language: JavaScript (javascript)
Event listeners are the backbone of web interactivity, allowing you to respond to user actions effectively.
A Real-World Example: Building a To-Do List
To demonstrate the power of HTML DOM methods, let’s create a simple to-do list application. This example will illustrate how these methods come together to build an interactive web feature.
We start with a minimal HTML structure:
<!DOCTYPE html>
<html>
<head>
    <title>To-Do List</title>
</head>
<body>
    <h1>My To-Do List</h1>
    <input type="text" id="task" placeholder="Add a new task">
    <button id="add">Add</button>
    <ul id="taskList">
        <!-- Tasks will be added here -->
    </ul>
    <script src="todo.js"></script>
</body>
</html>Code language: HTML, XML (xml)
In this structure, we have an input field for adding tasks
, a button to add them, and an unordered list (<ul>) where the tasks will be displayed. The JavaScript file todo.js will handle the functionality.
Here’s the corresponding JavaScript (todo.js) to add tasks:
const addButton = document.getElementById('add');
const taskInput = document.getElementById('task');
const taskList = document.getElementById('taskList');

addButton.addEventListener('click', function () {
    const taskText = taskInput.value;
    if (taskText.trim() !== '') {
        const taskItem = document.createElement('li');
        taskItem.textContent = taskText;
        taskList.appendChild(taskItem);
        taskInput.value = '';
    }
});Code language: JavaScript (javascript)
Output :
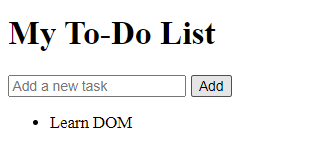
In this code, we select elements by their IDs, add an event listener to the “Add” button, and create new list items when the button is clicked. This practical example showcases how HTML DOM methods can be used to create an interactive feature that dynamically updates the DOM.
Conclusion
In the realm of web development, HTML DOM methods are a developer’s toolkit for transforming static web pages into dynamic, interactive experiences. These methods enable us to access, manipulate, and interact with web page elements, making it possible to create engaging web applications.
As you continue your journey in web development, keep in mind that mastering HTML DOM methods is akin to wielding a formidable set of tools. Use them wisely, and you’ll be able to craft web experiences that captivate and delight users. Whether you’re building a simple to-do list or a complex web application, HTML DOM methods are your companions on the path to creating remarkable web experiences.
