CSS – Fonts
Certainly! Fonts are a fundamental element of web design that can greatly influence the aesthetics and readability of a website. In CSS (Cascading Style Sheets), you have the flexibility to control various aspects of fonts to create a visually appealing and user-friendly web experience. Here’s an overview of how fonts are managed in CSS:
1. Font Family: The font-family property allows you to specify the typeface or font family for text elements. You can choose from a wide range of fonts, both web-safe and custom, to define the visual style of your text. For example:
<!DOCTYPE html>
<html>
<head>
<title>Font Family Example</title>
<style>
/* Apply fonts to specific elements */
h1 {
font-family:'Franklin Gothic Medium', 'Arial Narrow', Arial, sans-serif;
}
p {
font-family:'Times New Roman', Times, serif;
}
</style>
</head>
<body>
<h1>This is a heading with a custom font</h1>
<p>This is a paragraph with another custom font.</p>
</body>
</html>
Code language: HTML, XML (xml)Output :

In this example :
h1 { font-family: 'Franklin Gothic Medium', 'Arial Narrow', Arial, sans-serif; }: This CSS rule selects all<h1>elements on the page and specifies a font family for them. The font will be chosen based on availability. If the “Franklin Gothic Medium” font is not available on the user’s computer, the browser will try to use “Arial Narrow.” If that’s not available either, it will try “Arial.” Finally, if none of these fonts are available, it will fall back to a generic sans-serif font.p { font-family: 'Times New Roman', Times, serif; }: Similarly, this CSS rule selects all<p>(paragraph) elements and sets a font family. It first tries to use “Times New Roman,” then “Times,” and if none of these fonts are available, it will use a generic serif font.
2. Font Size: The font-size property determines the size of your text. You can express the size in various units such as pixels (px), ems (em), or percentages (%). For instance:
<!DOCTYPE html>
<html>
<head>
    <title>Font Size Example</title>
    <style>
        /* Setting font size for different elements */
        h1 {
            font-size: 36px; /* Larger font size for headings */
        }

        p {
            font-size: 18px; /* Standard font size for paragraphs */
        }

        .small-text {
            font-size: 14px; /* Smaller font size for a specific class */
        }

        /* Adjusting font size with relative units */
        .larger-text {
            font-size: 1.5em; /* 1.5 times the parent element's font size */
        }
    </style>
</head>
<body>
    <h1>This is a Large Heading</h1>
    <p>This is a standard-sized paragraph of text.</p>
    <p class="small-text">This is a smaller paragraph of text using a class.</p>
    <div class="larger-text">
        <p>This text has a font size of 1.5 times the parent element's font size.</p>
    </div>
</body>
</html>Code language: HTML, XML (xml)
Output :
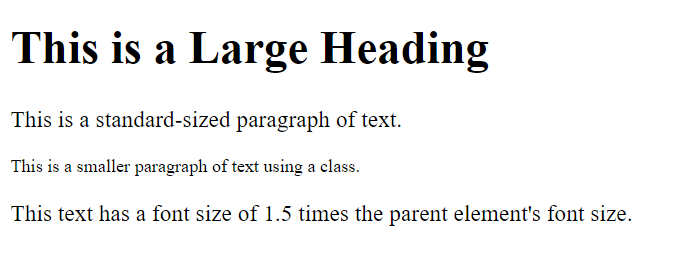
In this HTML example:
- We have an HTML document structure that includes a title, some headings, paragraphs, and a
<div>element. - In the embedded
<style>section, we use CSS to control the font sizes for different elements: <h1>elements have a larger font size of 36 pixels.<p>elements have a standard font size of 18 pixels.- Elements with the class
small-texthave a smaller font size of 14 pixels. - The
<div>with the classlarger-textcontains a paragraph with a font size of 1.5 times the parent element’s font size, which in this case is 18 pixels (the font size of the surrounding<p>element), resulting in 27 pixels.
These font size settings help to define the visual hierarchy of the content, making headings stand out and allowing for variation in text size for different elements as needed for styling and readability. The use of relative units like em in the last example also demonstrates how font sizes can be adjusted proportionally based on the parent element’s size.
3. Font Style and Weight: CSS offers properties like font-style and font-weight to control the style and thickness of the text. You can make text italic, bold, or adjust the weight as needed:
<!DOCTYPE html>
<html>
<head>

    <title>Font Style and Weight Example</title>
    <style>
        /* Setting font style and weight for different elements */
        h1 {
            font-style: italic; /* Italic font style */
            font-weight: bold; /* Bold font weight */
        }

        p.normal {
            font-style: normal; /* Normal font style (default) */
            font-weight: normal; /* Normal font weight (default) */
        }

        .custom-font {
            font-family: 'Courier New', monospace; /* Using a specific font family */
        }
    </style>
</head>
<body>
    <h1>This is an <span class="custom-font">italic and bold</span> heading</h1>
    <p class="normal">This is a normal paragraph of text.</p>
    <p>This is another paragraph with the default font style and weight.</p>
</body>
</html>
Code language: HTML, XML (xml)
Output :
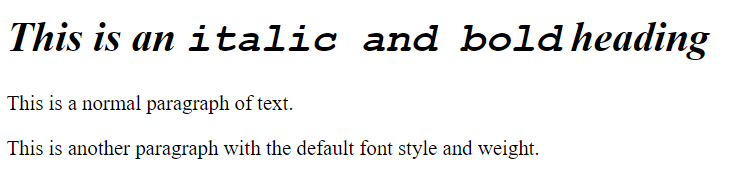
In this HTML example:
- We have an HTML document structure with a title, headings, and paragraphs.
- Inside the embedded
<style>section, we use CSS to control the font style and weight for different elements:<h1>elements have an italic font style (font-style: italic;) and a bold font weight (font-weight: bold;). This makes the heading both italicized and bold.- Paragraphs with the class
normalhave their font style set to normal (font-style: normal;) and their font weight set to normal (font-weight: normal;). This resets the font style and weight to their default values. - The class
.custom-fontis used to apply a specific font family, ‘Courier New’, to the enclosed text. This demonstrates how you can use a custom font family to style text within an element.
- Within the HTML content, we use
<span>elements to enclose specific portions of text within the heading. These<span>elements are assigned the classcustom-font, which applies the ‘Courier New’ font family to the enclosed text.
This example illustrates how you can use CSS to control the font style and weight of text elements within an HTML document. You can further customize the styling of your text by applying different combinations of font styles, weights, and font families to achieve your desired design.
4. Text Decoration: The text-decoration property allows you to add or remove text decorations like underlines or overlines. You can use it to style hyperlinks, for example:
<!DOCTYPE html>
<html>
<head>

    <title>Text Decoration Example</title>
    <style>
        /* Applying text decoration to different elements */
        h1 {
            text-decoration: underline; /* Underline text */
        }

        p {
            text-decoration: line-through; /* Strikethrough text */
        }

        a {
            text-decoration: none; /* Remove underline from links */
            color: blue; /* Change link color */
        }

        .highlight {
            background-color: yellow; /* Highlight text with background color */
        }
    </style>
</head>
<body>
    <h1>This is an <span class="highlight">underlined</span> heading</h1>
    <p>This text has a <span class="highlight">line-through</span> decoration.</p>
    <p><a href="#">This is a link without underline</a></p>
</body>
</html>
Code language: HTML, XML (xml)
Output :
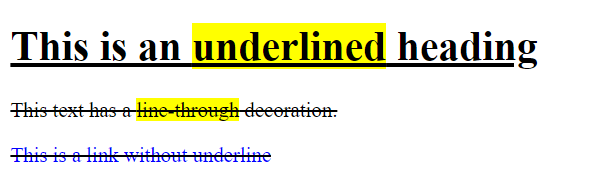
In this HTML example:
- We have an HTML document structure with a title, headings, paragraphs, and a link.
- Inside the embedded
<style>section, we use CSS to control text decoration for different elements:<h1>elements have an underline text decoration (text-decoration: underline;), which adds an underline beneath the heading text.<p>elements have a line-through text decoration (text-decoration: line-through;), which adds a horizontal line through the middle of the paragraph text.<a>elements (links) have their text decoration removed (text-decoration: none;), which removes the default underline from links. We also change the link color to blue (color: blue;).- The class
.highlightis used to apply a background color (yellow) to the enclosed text. While not a text decoration property per se, it’s a way to visually highlight text.
- Within the HTML content, we use
<span>elements to enclose specific portions of text within headings and paragraphs. These<span>elements are assigned the class.highlight, which applies the background color to the enclosed text.
This example illustrates how you can use CSS to control text decoration, including underlining, strikethrough, and link styling, to enhance the visual appearance of text elements within an HTML document. You can further customize text decoration to match your design preferences.
5. Line Height: The line-height property controls the spacing between lines of text. It can be specified as a unit or a multiplier of the font size:
<!DOCTYPE html>
<html>
<head>
    <title>Line Height Example</title>
    <style>
        /* Setting line height for different elements */
        h1 {
            line-height: 1.5; /* Increase line height for headings */
        }

        p {
            line-height: 1.2; /* Adjust line height for paragraphs */
        }

        .double-space {
            line-height: 2; /* Double spacing for specific text */
        }
    </style>
</head>
<body>
    <h1>This is a Heading with<br><span class="double-space">Double-Spaced Text</span></h1>
    <p>Paragraphs have a line height of 1.2 to create some spacing between lines of text.</p>
    <p class="double-space">This paragraph has double-spaced text, with a line height of 2.</p>
</body>
</html>
Code language: HTML, XML (xml)
Output :
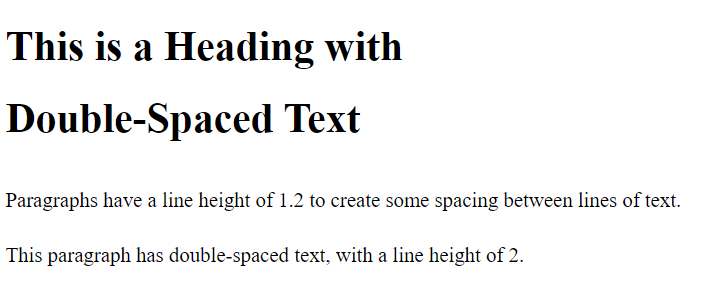
In this HTML example:
- We have an HTML document structure with a title, headings, paragraphs, and a custom class for double-spaced text.
- Inside the embedded
<style>section, we use CSS to control the line height for different elements:<h1>elements have a line height of 1.5 (line-height: 1.5;), which increases the space between lines of text in headings.<p>elements have a line height of 1.2 (line-height: 1.2;), adjusting the spacing between lines in paragraphs.- The class
.double-spaceis used to apply a line height of 2 (line-height: 2;) to specific text enclosed within<span>elements. This results in double-spaced text.
- Within the HTML content, we use
<br>elements to create line breaks within the heading to separate the double-spaced text. - We also use the
<span>element with the class.double-spaceto apply double-spacing to specific text within the heading and paragraph.
This example demonstrates how you can use the line-height property in CSS to control the spacing between lines of text, whether you want to increase it for headings or create double spacing for specific sections of text. Adjusting line height can improve the readability and visual appearance of your content.
These CSS properties provide the means to customize fonts and typography, enhancing the visual appeal and legibility of your website. By carefully selecting fonts and adjusting their properties, you can create a unique and engaging user experience.
