---
title: "ReactJS – Installation"
url: https://khanwaseem.com/blog/course/reactjs-installation
author: "khan Waseem"
published: 2023-10-17
updated: 2023-10-17
topics: ["course", "React Tutorial"]
description: "Learn how to install ReactJS for web development with our step-by-step guide. Set up your environment and start creating dynamic user interfaces."
---
# ReactJS – Installation
ReactJS, often referred to simply as React, is a JavaScript library renowned for its ability to create dynamic and interactive user interfaces. If you’re eager to get started with React and want to learn the installation process, you’ve come to the right place. In this guide, we’ll walk you through the steps to install ReactJS on your system and set the stage for your web development journey.
Table of Contents
[Toggle](#)
- [What You’ll Need](#what-youll-need)
- [The serve static server](#the-serve-static-server)
- [Installing Create React App](#installing-create-react-app)
- [Exploring the Project Structure](#exploring-the-project-structure)
- [Starting the Development Server](#starting-the-development-server)
- [Writing Your First React Component](#writing-your-first-react-component)
- [Creating Additional Components](#creating-additional-components)
- [Installing Additional Packages](#installing-additional-packages)
- [Building for Production](#building-for-production)
- [Conclusion](#conclusion)
## What You’ll Need
Before we dive into the installation process, let’s make sure you have everything you need.
**1. Node.js**: React is built on Node.js, so make sure you have it installed. If you don’t already have Node.js, you can download it from the official website: [Node.js Official Website](https://nodejs.org/).
Once the installation process is complete, you can verify the version of Node.js and npm in your command prompt.
```bash
node -versionCode language: Bash (bash)
```
```bash
npm -versionCode language: Bash (bash)
```
**2. A Code Editor**: You’ll need a code editor to write your React code. Popular options include Visual Studio Code, Sublime Text, and Atom. You can choose the one that best suits your preferences.
With these two prerequisites in place, you’re all set to install ReactJS.
## The serve static server
Serve is a lightweight web server designed for efficiently serving static sites and single-page applications. It loads quickly and requires minimal memory. This tool is particularly useful for hosting React applications. To install Serve on your system, you can use the npm package manager.
```bash
npm install serve -gCode language: Bash (bash)
```
Let us create a simple static site and serve the application using ***serve* **app.
## Installing Create React App
```bash
npx create-react-app my-react-appCode language: Bash (bash)
```
Replace `**my-react-app**` with the name you want to give to your project. This command creates a new React application with the specified name.
## Exploring the Project Structure
Once the installation is complete, you’ll have a directory structure for your React project. Let’s take a quick look at the important files and directories:
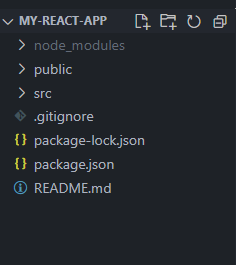
- **`node_modules`**: This directory contains all the project’s dependencies, including React and its associated libraries.
- **`public`**: This directory contains the HTML file (usually `index.html`) where your React app is rendered. You can also find the `favicon.ico` and other assets here.
- **`src`**: This is where your React application code resides. You’ll primarily work in this directory.
- **`package.json`**: This file holds metadata about your project, including the project’s name, version, and dependencies.
- **`package-lock.json`**: This file is automatically generated and ensures that the versions of your dependencies remain consistent.
- **`README.md`**: This is the project’s readme file, which provides information and instructions on how to work with the project.
## Starting the Development Server
Before we start writing React components, let’s get your development server up and running. In your project directory, run the following command:
```bash
npm startCode language: Bash (bash)
```
This command starts the development server and opens your React app in your default web browser. You’ll see a basic React app with a default landing page.
## Writing Your First React Component
Now that your development server is running, let’s create your first React component. Open the `src` directory and locate the `App.js` file. This file is the entry point for your React application. By default, it contains the following code:
```javascript
import React from 'react';
import './App.css';
function App() {
return (
);
}
export default App;Code language: JavaScript (javascript)
```
**Output : **
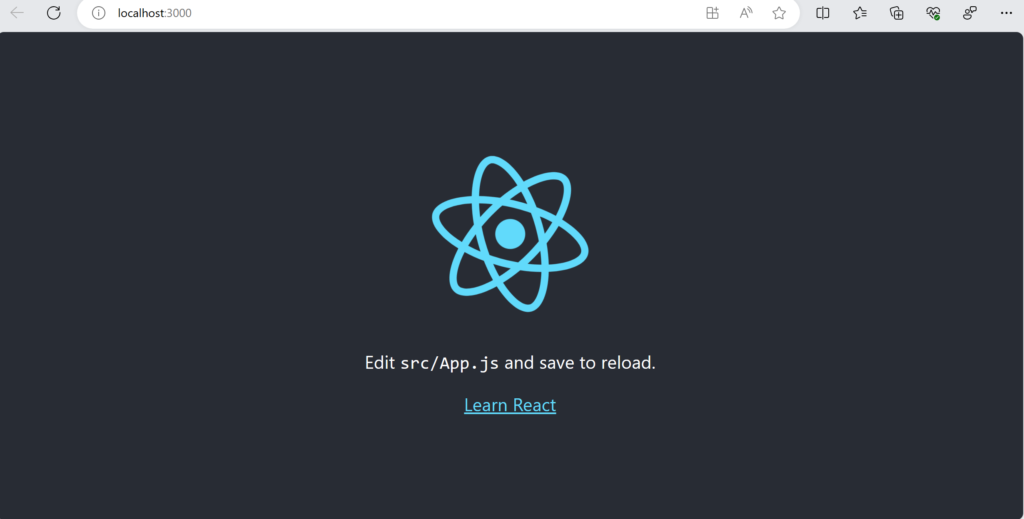
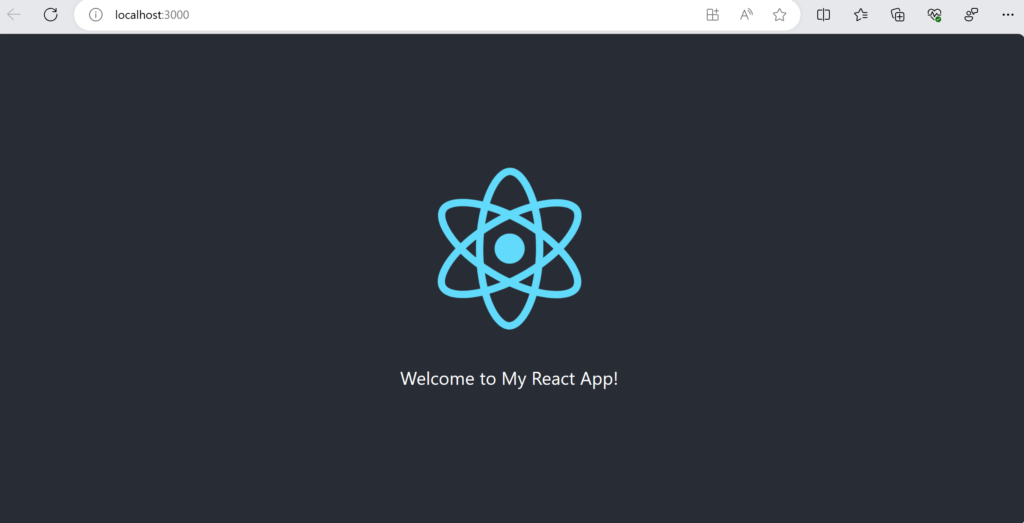
You can edit this component to create your own content. For instance, you can replace the text in the `` element with your own message. Save the file, and you’ll see the changes reflected in your browser immediately, thanks to React hot-reloading feature.
```javascript
import logo from './logo.svg';
import './App.css';
function App() {
return (

Welcome to My React App!
);
}
export default App;Code language: JavaScript (javascript)
```
**Output : **
## Creating Additional Components
In a real-world React application, you’ll often create multiple components to build complex user interfaces. You can create new components in the `src` directory.
For example, to create a `Header` component, you can create a new file named `Header.js` in the `src` directory and define your component within it:
```javascript
import React from 'react';
function Header() {
return (
);
}
export default Header;Code language: JavaScript (javascript)
```
Now, you can use this `Header` component in your `App.js` file like this:
```javascript
import './App.css';
import Header from './Componet/Header'; // Import your custom component
function App() {
return (
{/* Use the Header component */}
Welcome to My React App!
);
}
export default App;Code language: JavaScript (javascript)
```
**Output : **
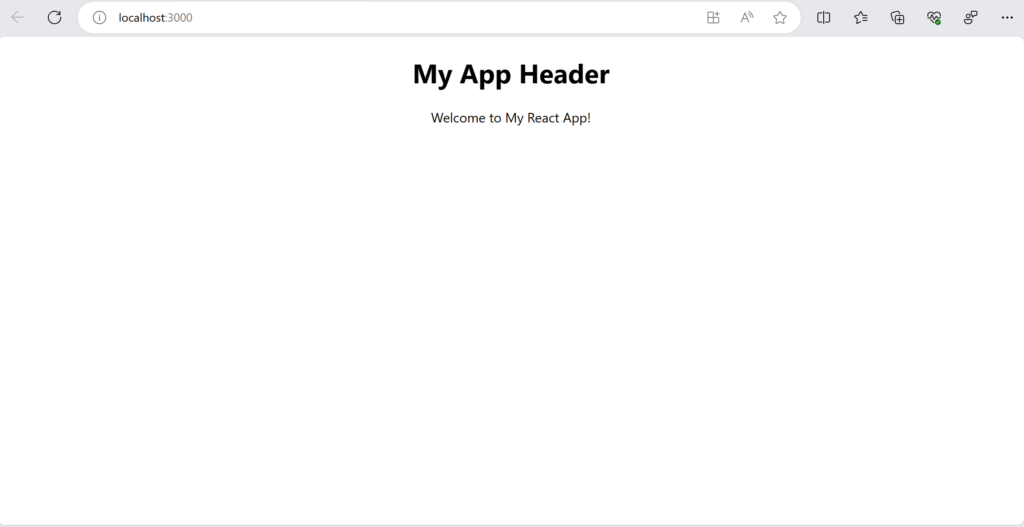
Remember to import your custom component at the top of your `App.js` file. This is how you can start building more complex interfaces by breaking them down into reusable components.
## Installing Additional Packages
While Create React App provides a solid foundation for your React project, you might need additional packages for specific features or functionality. Here’s how to install a package, such as Axios for making HTTP requests:
```bash
npm install axiosCode language: Bash (bash)
```
This command installs Axios and adds it to your project’s `package.json` as a dependency. You can then import and use Axios in your project as needed.
## Building for Production
Once you’ve developed your React app, you can build it for production deployment. Run the following command:
```bash
npm run buildCode language: Bash (bash)
```
This command creates an optimized build of your application in the `build` directory. You can then deploy this build to a web server, hosting service, or a platform of your choice.
## Conclusion
Installing ReactJS and setting up your development environment is the first step in your journey towards building powerful, interactive web applications. With React’s component-based architecture and the support of the Create React App tool, you can quickly get started and begin creating complex user interfaces.
Remember that React is a versatile library, and there is much more to explore, such as state management, routing, and working with third-party libraries. As you become more familiar with React, you’ll be able to create dynamic and responsive web applications that can meet a wide range of requirements.
### Related posts:
[CSS – Table](https://blog.khanwaseem.com/css-table/)
[HTML – Tables](https://blog.khanwaseem.com/html-tables/)
[CSS – Text](https://blog.khanwaseem.com/css-text/)
[React Master: Front-End Power](https://blog.khanwaseem.com/react-master-front-end-power/)
Powered by [YARPP](https://yarpp.com).