---
title: "JavaScript – Form"
url: https://khanwaseem.com/blog/course/javascript-form-validation
author: "khan Waseem"
published: 2023-10-03
updated: 2023-10-07
topics: ["course", "Javascript Tutorial"]
description: "Learn how to implement JavaScript form validation for secure and user-friendly web forms. Enhance data accuracy and improve user experiences with effective validation techniques."
---

# JavaScript – Form

Web forms are an integral part of modern websites, facilitating user interaction and data collection. JavaScript, a versatile scripting language, empowers developers to enhance the functionality and user experience of web forms. In this concise guide, we will explore some key ways to simplify web forms using JavaScript.

```xml
<!DOCTYPE html>
<html>
<head>
    <title>Sample Form</title>
</head>
<body>
    <h1>Contact Us</h1>
    <form action="process_form.php" method="POST">
        <label for="name">Name:</label>
        <input type="text" id="name" name="name" required><br><br>
        
        <label for="email">Email:</label>
        <input type="email" id="email" name="email" required><br><br>
        
        <label for="message">Message:</label><br>
        <textarea id="message" name="message" rows="4" required></textarea><br><br>
        
        <input type="submit" value="Submit">
    </form>
</body>
</html>
Code language: HTML, XML (xml)
```

**Output : **
![](https://blogkhanwaseem.s3.amazonaws.com/uploads/2023/10/07103423/image-9.png)

**In this example:**

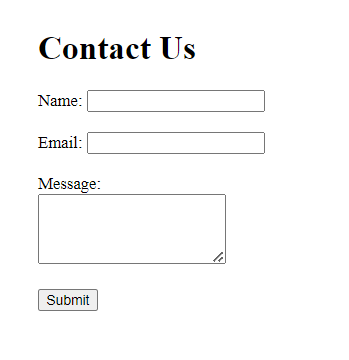
- We have an HTML form enclosed within the `**<form>**` element.

- The form has an **`action` **attribute that specifies where the form data should be sent when submitted. In this case, it’s set to “process_form.php,” which is a common placeholder for the server-side script that will handle form submission.

- The **`method` **attribute is set to “POST,” indicating that the form data should be sent to the server using the HTTP POST method.

- Inside the form, there are several form elements:

Text input for the name.

- Email input for the email address.

- Textarea for the message.

- A submit button to submit the form.

- Each form element has a **`name` **attribute, which is used to identify the form data when it’s submitted to the server.

- We’ve also used the **`label` **element to provide labels for each form field. The **`for` **attribute of the label corresponds to the `id` of the associated form element, improving accessibility.

- The **`required` **attribute is added to form fields to indicate that they must be filled out before the form can be submitted.

This is a simple HTML form that you can use as a starting point for various types of data collection on your website. Remember that to process the form data, you’ll typically need a server-side script (e.g., PHP, Python, Node.js) to handle the form submission and perform actions based on the user’s input.

**1. Form Validation:** JavaScript can be employed to validate user inputs in real-time, reducing the likelihood of errors. By adding event listeners to form fields, you can check for valid data formats, such as email addresses, phone numbers, or dates. Providing instant feedback to users about their input can streamline the form-filling process.

```javascript
<!DOCTYPE html>
<html>
<head>
    <title>Registration Form</title>
    <script>
        function validateForm() {
            var name = document.forms["registrationForm"]["name"].value;
            var email = document.forms["registrationForm"]["email"].value;
            var password = document.forms["registrationForm"]["password"].value;

            if (name == "") {
                alert("Name must be filled out");
                return false;
            }

            if (email == "") {
                alert("Email must be filled out");
                return false;
            } else {
                // Simple email validation using a regular expression
                var emailPattern = /^[a-zA-Z0-9._-]+@[a-zA-Z0-9.-]+\.[a-zA-Z]{2,4}$/;
                if (!emailPattern.test(email)) {
                    alert("Invalid email address");
                    return false;
                }
            }

            if (password == "") {
                alert("Password must be filled out");
                return false;
            } else if (password.length < 8) {
                alert("Password must be at least 8 characters long");
                return false;
            }

            // If all validation passes, the form is submitted
            return true;
        }
    </script>
</head>
<body>
    <h1>Registration Form</h1>
    <form name="registrationForm" action="process_form.php" method="POST" onsubmit="return validateForm()">
        <label for="name">Name:</label>
        <input type="text" id="name" name="name"><br><br>
        
        <label for="email">Email:</label>
        <input type="email" id="email" name="email"><br><br>
        
        <label for="password">Password:</label>
        <input type="password" id="password" name="password"><br><br>
        
        <input type="submit" value="Register">
    </form>
</body>
</html>
Code language: JavaScript (javascript)
```

**Output : **
![](https://blogkhanwaseem.s3.amazonaws.com/uploads/2023/10/07104908/image-11.png)

**In this example:**

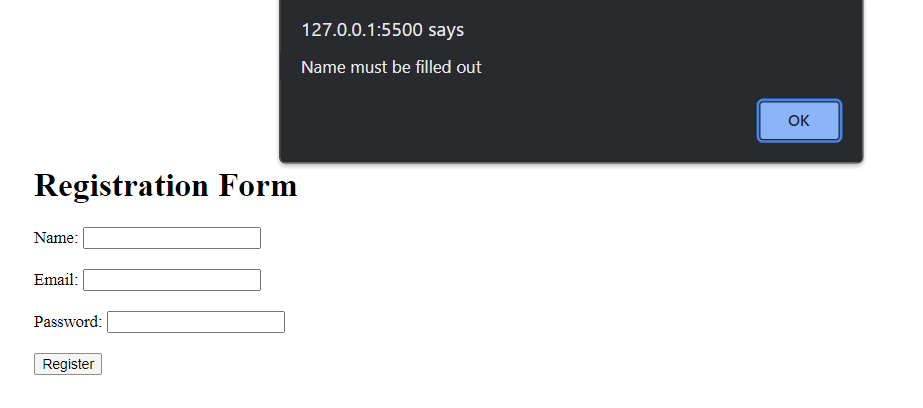
- We have a registration form with fields for name, email, and password.

- JavaScript is used to define the `validateForm` function, which is called when the form is submitted (`onsubmit="return validateForm()"`).

- Inside `validateForm`, we retrieve the values of the name, email, and password fields.

- We check if each field is empty and display an alert if it is.

- For email validation, we use a simple regular expression pattern to check if the email address format is valid.

- We also check if the password is at least 8 characters long.

- If any validation fails, the function returns `false`, preventing the form from being submitted. If all validation passes, the form is submitted to the server.

**2. Auto-Focus:** Improve user experience by automatically focusing on the first input field when a page loads. This eliminates the need for users to click on the form field, making it more user-friendly.

```javascript
<!DOCTYPE html>
<html>
<head>
    <title>Auto-Focus with JavaScript</title>
    <script>
        window.onload = function() {
            document.getElementById('username').focus();
        };
    </script>
</head>
<body>
    <h1>Login Form</h1>
    <form>
        <label for="username">Username:</label>
        <input type="text" id="username" name="username"><br><br>
        
        <label for="password">Password:</label>
        <input type="password" id="password" name="password"><br><br>
        
        <input type="submit" value="Login">
    </form>
</body>
</html>
Code language: JavaScript (javascript)
```

**Output : **
![](https://blogkhanwaseem.s3.amazonaws.com/uploads/2023/10/07105112/image-12.png)

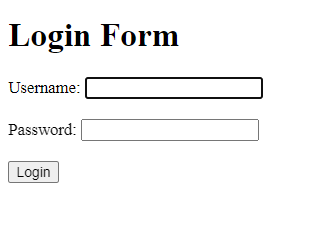
In this example, the JavaScript code in the `**<script>**` tag sets focus on the “Username” input field when the page loads. The `**window.onload**` event ensures that the JavaScript code runs after the entire page has loaded.

**3. Dynamic Form Elements:** JavaScript enables the creation of dynamic form elements that appear or disappear based on user choices. This can simplify complex forms by only displaying relevant fields.

```javascript
<!DOCTYPE html>
<html>
<head>
    <title>Dynamic Form Example</title>
    <script>
        // Function to add or remove input fields based on user selection
        function toggleInputs() {
            var selectElement = document.getElementById("selectOption");
            var selectedValue = selectElement.value;
            var dynamicFieldsContainer = document.getElementById("dynamicFields");

            // Clear any existing dynamic fields
            dynamicFieldsContainer.innerHTML = "";

            if (selectedValue === "yes") {
                // Add input fields when "Yes" is selected
                var input1 = document.createElement("input");
                input1.type = "text";
                input1.name = "field1";
                input1.placeholder = "Field 1";

                var input2 = document.createElement("input");
                input2.type = "text";
                input2.name = "field2";
                input2.placeholder = "Field 2";

                dynamicFieldsContainer.appendChild(input1);
                dynamicFieldsContainer.appendChild(input2);
            } else if (selectedValue === "no") {
                // Add a single input field when "No" is selected
                var input3 = document.createElement("input");
                input3.type = "text";
                input3.name = "field3";
                input3.placeholder = "Field 3";

                dynamicFieldsContainer.appendChild(input3);
            }
        }
    </script>
</head>
<body>
    <h1>Dynamic Form Example</h1>
    <form>
        <label for="selectOption">Select an option:</label>
        <select id="selectOption" onchange="toggleInputs()">
            <option value="">Select</option>
            <option value="yes">Yes</option>
            <option value="no">No</option>
        </select><br><br>

        <div id="dynamicFields">
            <!-- Dynamic input fields will be added here -->
        </div>

        <input type="submit" value="Submit">
    </form>
</body>
</html>
Code language: JavaScript (javascript)
```

**Output : **

![](https://blogkhanwaseem.s3.amazonaws.com/uploads/2023/10/07105611/image-13.png)

**in this example:**

- We have a simple HTML form with a `<select>` element that allows users to choose between “Yes” and “No.”

- We use the `onchange` attribute in the `<select>` element to call the `toggleInputs()` JavaScript function whenever the user makes a selection.

- The `toggleInputs()` function gets the selected value from the `<select>` element and clears any existing dynamic fields.

- Depending on the selected value, it dynamically creates and appends input fields to the `<div>` with the `id` “dynamicFields.”

- If “Yes” is selected, it adds two input fields (“Field 1” and “Field 2”).

- If “No” is selected, it adds a single input field (“Field 3”).

This example demonstrates how you can use JavaScript to create dynamic form elements that change based on user choices. You can extend this concept to create more complex forms with conditional fields or dynamic sections based on user interactions.

**4. Asynchronous Form Submission:** Submitting forms without a page reload can enhance the user experience. JavaScript, in combination with AJAX or Fetch API, allows you to send data to the server and update the UI without refreshing the entire page.

```javascript
<!DOCTYPE html>
<html>
<head>
    <title>Asynchronous Form Submission Example</title>
    <script>
        document.addEventListener("DOMContentLoaded", function () {
            const form = document.getElementById("myForm");

            form.addEventListener("submit", function (event) {
                event.preventDefault(); // Prevent the default form submission

                const formData = new FormData(form);

                fetch("process_form.php", {
                    method: "POST",
                    body: formData
                })
                .then(response => {
                    if (response.ok) {
                        return response.text();
                    } else {
                        throw new Error("Server responded with an error.");
                    }
                })
                .then(data => {
                    // Handle the response data here (e.g., display a success message)
                    console.log(data);
                })
                .catch(error => {
                    // Handle errors (e.g., display an error message)
                    console.error(error);
                });
            });
        });
    </script>
</head>
<body>
    <h1>Asynchronous Form Submission Example</h1>
    <form id="myForm">
        <label for="name">Name:</label>
        <input type="text" id="name" name="name" required><br><br>

        <label for="email">Email:</label>
        <input type="email" id="email" name="email" required><br><br>

        <input type="submit" value="Submit">
    </form>
</body>
</html>
Code language: JavaScript (javascript)
```

**Output : **

![](https://blogkhanwaseem.s3.amazonaws.com/uploads/2023/10/07110324/image-14.png)

**In this example:**

- We have an HTML form with two input fields (name and email) and a submit button.

- We attach a `submit` event listener to the form using JavaScript, preventing the default form submission with `event.preventDefault()`.

- When the form is submitted, we create a `FormData` object containing the form data.

- We use the Fetch API to send a POST request to a server endpoint (in this case, “process_form.php”) with the form data in the request body.

- If the server responds with a successful HTTP status code (e.g., 200 OK), we handle the response data (in this case, we log it to the console).

- If there’s an error, such as a network issue or a server error, we catch and handle it appropriately.

This example demonstrates how to perform asynchronous form submission using the Fetch API in modern web development. You can replace the server endpoint (“process_form.php”) with your server-side script that processes the form data and responds accordingly.

In conclusion, JavaScript empowers web developers to simplify and enhance web forms in various ways, from real-time validation to dynamic elements and asynchronous submission. By incorporating these techniques into your projects, you can create forms that are more user-friendly and efficient, ultimately improving the overall user experience on your website.

### Related posts:

[HTML – Forms](https://blog.khanwaseem.com/html-forms/)
[JavaScript – Events](https://blog.khanwaseem.com/javascript-events/)
[JavaScript-Form properties and methods](https://blog.khanwaseem.com/javascript-form-properties-and-methods/)
[HTML – Attributes](https://blog.khanwaseem.com/html-attributes/)

Powered by [YARPP](https://yarpp.com).
