---
title: "HTML – Formatting"
url: https://khanwaseem.com/blog/course/html-formatting
author: "khan Waseem"
published: 2023-09-19
updated: 2023-09-19
topics: ["course", "HTML Tutorial"]
description: "Explore HTML formatting techniques for text, headings, lists, and more. Learn how to structure and style content on web pages effectively with HTML elements."
---

# HTML – Formatting

In HTML, formatting refers to the way you present and style your content on a web page. It includes various HTML elements and techniques that help structure text, add emphasis, create lists, and control the layout and appearance of your content.

Table of Contents

[Toggle](#)

- [Bold Text :](#bold-text)
- [Italic Text :](#italic-text)
- [Underlined Text :](#underlined-text)
- [Strike Text :](#strike-text)
- [Monospaced Font :](#monospaced-font)
- [Superscript Text :](#superscript-text)
- [Subscript Text :](#subscript-text)
- [Inserted Text :](#inserted-text)
- [Deleted Text :](#deleted-text)
- [Grouping Content :](#grouping-content)

## Bold Text :

In HTML, you can make text bold using the `<strong>` element or the `<b>` element. Both elements are used to indicate text that should be displayed in a bold font. Here’s how you can use them:

Using the `<strong>` element:

```xml
<p>This is <strong>bold text</strong> using the &lt;strong&gt; element.</p>Code language: HTML, XML (xml)
```

Using the `<b>` element:

```xml
<p>This is <b>bold text</b> using the &lt;b&gt; element.</p>Code language: HTML, XML (xml)
```

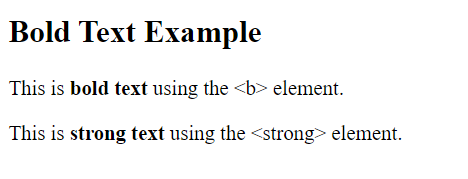
Both of these examples will render as: “This is **bold text** using the **element.” and “This is bold text using the element.”** While both `**<strong>**` and `**<b>**` can make text bold, there is a semantic difference between them. The `**<strong>**` element is used to indicate strong importance or emphasis, while `**<b>**` is used for stylistic bolding without conveying strong importance. It’s generally recommended to use `**<strong>**` when the bold text is meant to carry significance or emphasis.

**Exmaple : **

```xml
<!DOCTYPE html>
<html>
<head>
    <title>Bold Text Example</title>
</head>
<body>
    <h2>Bold Text Example</h2>
    
    <!-- Using the <b> element -->
    <p>This is <b>bold text</b> using the &lt;b&gt; element.</p>

    <!-- Using the <strong> element -->
    <p>This is <strong>strong text</strong> using the &lt;strong&gt; element.</p>
</body>
</html>Code language: HTML, XML (xml)
```

**Output : **
![](https://blogkhanwaseem.s3.amazonaws.com/uploads/2023/09/19184925/image-168.png)

**In this example:**

- We have a basic HTML document with a heading (`<h2>`).

- We use both the `<b>` element and the `<strong>` element to make text bold within two separate paragraphs.

- When you open this HTML file in a web browser, you will see that the text enclosed within the `<b>` and `<strong>` elements appears bold. Both elements are commonly used for making text visually bold, but `<strong>` also carries semantic meaning, indicating that the text is of strong importance, which can be useful for screen readers and search engines.

## Italic Text :

In HTML, you can make text italic using the `<em>` element or the `<i>` element. Both elements are used to indicate text that should be displayed in an italic font. Here’s how you can use them:

Using the `<em>` element:

```xml
<p>This is <em>italic text</em> using the &lt;em&gt; element.</p>Code language: HTML, XML (xml)
```

Using the `<i>` element:

```xml
<p>This is <i>italic text</i> using the &lt;i&gt; element.</p>Code language: HTML, XML (xml)
```

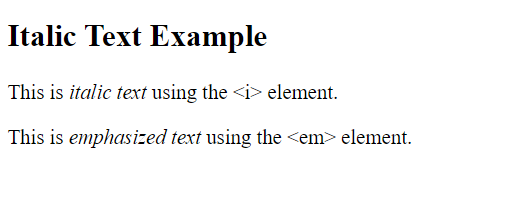
Both of these examples will render as: “This is *italic text* using the *element.” and “This is italic text using the element.”* Similar to the `**<strong>**` and `**<b>**` elements for bold text, there is a semantic difference between `**<em>**` and** `<i>`**. The `**<em>**` element is used to indicate emphasized text or text with a level of importance, while `**<i>**` is used for stylistic italics without conveying emphasis. It’s a good practice to use `**<em>**` when the italicized text is meant to carry meaning or emphasis.

**Exmaple : **

```xml
<!DOCTYPE html>
<html>
<head>
    <title>Italic Text Example</title>
</head>
<body>
    <h2>Italic Text Example</h2>
    
    <!-- Using the <i> element -->
    <p>This is <i>italic text</i> using the &lt;i&gt; element.</p>

    <!-- Using the <em> element -->
    <p>This is <em>emphasized text</em> using the &lt;em&gt; element.</p>
</body>
</html>Code language: HTML, XML (xml)
```

**Output : **
![](https://blogkhanwaseem.s3.amazonaws.com/uploads/2023/09/19185359/image-169.png)

In this example:

- We have a basic HTML document with a heading (`<h2>`).

- We use both the `<i>` element and the `<em>` element to make text italic within two separate paragraphs.

- When you open this HTML file in a web browser, you will see that the text enclosed within the `<i>` and `<em>` elements appears italic. Similar to the `<strong>` element for bold text, the `<em>` element carries semantic meaning, indicating that the text is emphasized or of importance. It is often preferred for italicizing text when there is a need for semantic emphasis.

## Underlined Text :

In HTML, you can underline text using the `<u>` element. The `<u>` element is used to define and format text with an underline. Here’s how you can use it:

```xml
<p>This is <u>underlined text</u> using the &lt;u&gt; element.</p>Code language: HTML, XML (xml)
```

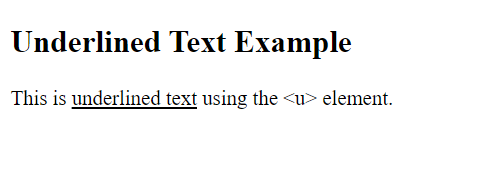
This example will render as: “This is **underlined text** using the `**<u>**` element.”

However, it’s important to note that the use of underlined text for general content is not recommended in modern web design. Underlines are often reserved for indicating hyperlinks (text links) to maintain consistency and clarity in user interface design. For emphasizing or styling text, it’s typically more common to use bold (`**<strong>**`), italics (`**<em>**`), or CSS styles to achieve the desired effect.

**Example : **

```xml
<!DOCTYPE html>
<html>
<head>
    <title>Underlined Text Example</title>
</head>
<body>
    <h2>Underlined Text Example</h2>
    
    <!-- Using the <u> element -->
    <p>This is <u>underlined text</u> using the &lt;u&gt; element.</p>
</body>
</html>Code language: HTML, XML (xml)
```

**Output : **
![](https://blogkhanwaseem.s3.amazonaws.com/uploads/2023/09/19185719/image-170.png)

In this example:

- We have a basic HTML document with a heading (`<h2>`).

- We use the `<u>` element to underline the text within a paragraph.

- When you open this HTML file in a web browser, you will see that the text enclosed within the `<u>` element appears underlined. The `<u>` element is used for adding an underline to text, but it’s important to note that underlining text is not a recommended practice for general content since underlined text can be confused with hyperlinks. It’s typically used sparingly for special cases where it carries specific meaning or emphasis. For general emphasis, it’s often better to use the `<em>` element for italics or CSS styles for other text decorations.

## Strike Text :

In HTML, you can strike through text to create a “strikethrough” or “line-through” effect using the `**<s>**` element or the `**<strike>**` element. Both elements are used to indicate that the text within them should be displayed with a horizontal line through it. Here’s how you can use them:

Using the `<s>` element:

```xml
<p>This is <s>strikethrough text</s> using the &lt;s&gt; element.</p>Code language: HTML, XML (xml)
```

Using the `<strike>` element:

```xml
<p>This is <strike>strikethrough text</strike> using the &lt;strike&gt; element.</p>Code language: HTML, XML (xml)
```

Both of these examples will render as: “This is strikethrough text using the `**<s>**` element.” and “This is strikethrough text using the `**<strike>**` element.”

The choice between `**<s>**` and `**<strike>**` is mostly a matter of preference, as both elements achieve the same visual result. However, it’s important to note that in modern HTML, the semantic meaning of the text should guide your choice. If the text is being removed or no longer relevant, you might consider using a different element or CSS to indicate that, rather than relying solely on the visual strikethrough effect.

**Example : **

```xml
<!DOCTYPE html>
<html>
<head>
    <title>Strike Through Text Example</title>
</head>
<body>
    <h2>Strike Through Text Example</h2>

    <!-- Using the <s> element (recommended) -->
    <p>This is <s>strikethrough text</s> using the &lt;s&gt; element.</p>

    <!-- Using the <strike> element (obsolete) -->
    <p>This is <strike>strikethrough text</strike> using the &lt;strike&gt; element.</p>
</body>
</html>Code language: HTML, XML (xml)
```

**Output : **
![](https://blogkhanwaseem.s3.amazonaws.com/uploads/2023/09/19190007/image-171.png)

In this example:

- We have a basic HTML document with a heading (`<h2>`).

- We use both the `<s>` element and the `<strike>` element to create strikethrough text within two separate paragraphs.

- When you open this HTML file in a web browser, you will see that the text enclosed within the `<s>` and `<strike>` elements appears with a strikethrough line. The `<s>` element is the recommended choice as it aligns with HTML5 standards, while the `<strike>` element is considered obsolete but still supported by most web browsers for backward compatibility.

## Monospaced Font :

In HTML, you can display text using a monospaced or fixed-width font by using the `<code>` element or the `<pre>` element, combined with CSS styles if necessary. Monospaced fonts are often used for displaying code, preserving whitespace, and maintaining the alignment of characters.

- **Using the `<code>` element:**
You can use the `<code>` element to indicate that a piece of text should be displayed in a monospaced font. By default, it does not add any line breaks or extra spacing.

```xml
   <p>This is some <code>monospaced font</code> text.</p>Code language: HTML, XML (xml)
```

- **Using the `<pre>` element:**
The `<pre>` element is used to display preformatted text, including monospaced font text. It preserves whitespace, line breaks, and the formatting of text exactly as it appears in the HTML code.

```xml
   <pre>
   This is
   preformatted
   monospaced font
   text.
   </pre>Code language: HTML, XML (xml)
```

If you want to style the monospaced text further or specify a particular monospaced font, you can use CSS. For example:

```xml
<style>
    .monospaced-text {
        font-family: "Courier New", monospace;
        font-size: 14px;
        /* Add more styling as needed */
    }
</style>

<p>This is some <code class="monospaced-text">styled monospaced font</code> text.</p>Code language: HTML, XML (xml)
```

In this example, the CSS styles the text with the “Courier New” monospaced font and adjusts the font size. You can customize the styling according to your design preferences.

**Example : **

To display text in a monospaced or fixed-width font in HTML, you can use the `<code>` element or apply CSS styles to the desired elements. Here’s an example of both approaches:

**Using the `<code>` Element:**

```xml
<!DOCTYPE html>
<html>
<head>
    <title>Monospaced Font Example</title>
</head>
<body>
    <h2>Monospaced Font Example</h2>

    <!-- Using the <code> element -->
    <p>This is <code>monospaced font text</code> using the &lt;code&gt; element.</p>
</body>
</html>Code language: HTML, XML (xml)
```

**Output : **
![](https://blogkhanwaseem.s3.amazonaws.com/uploads/2023/09/19190535/image-172.png)

**Using CSS Styles:**

```xml
<!DOCTYPE html>
<html>
<head>
    <title>Monospaced Font Example</title>
    <style>
        /* Apply a monospaced font to elements with the class "monospaced" */
        .monospaced {
            font-family: "Courier New", Courier, monospace;
        }
    </style>
</head>
<body>
    <h2>Monospaced Font Example</h2>

    <!-- Using CSS to apply a monospaced font -->
    <p>This is <span class="monospaced">monospaced font text</span> using CSS.</p>
</body>
</html>Code language: HTML, XML (xml)
```

**Output : **
![](https://blogkhanwaseem.s3.amazonaws.com/uploads/2023/09/19190605/image-173.png)

In these examples:

- We have a basic HTML document with a heading (`<h2>`).

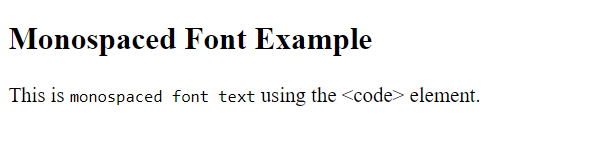
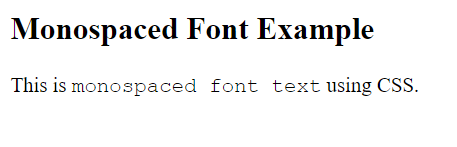
- In the first example, we use the `<code>` element to wrap the text that should appear in a monospaced font.

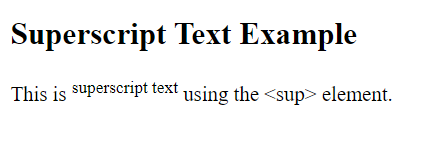
- In the second example, we use CSS to apply a monospaced font to the text within a `<span>` element with the class “monospaced.” We specify commonly used monospaced fonts like “Courier New” and “Courier” in the `font-family` property. The `monospace` keyword is a generic fallback for monospaced fonts.

- When you open these HTML files in a web browser, you will see that the text enclosed within the `<code>` element or the `<span>` element with the “monospaced” class appears in a monospaced font. Monospaced fonts are often used for displaying code snippets, computer programming code, or any content where maintaining the alignment of characters is essential.

## Superscript Text :

In HTML, you can create superscript text using the `<sup>` element. Superscript text is typically used for footnotes, mathematical exponents, and other content that should appear slightly above the regular text baseline. Here’s how you can use the `<sup>` element:

```xml
<p>This is regular text with some <sup>superscript</sup> text.</p>Code language: HTML, XML (xml)
```

This example will render as: “This is regular text with some superscript text.”

You can use the `<sup>` element to enclose the text that you want to be superscripted. It’s worth noting that the default rendering of superscript text may vary slightly between different web browsers and CSS stylesheets, but the `<sup>` element ensures that the text is displayed above the baseline.

**Example : **

```xml
<!DOCTYPE html>
<html>
<head>
    <title>Superscript Text Example</title>
</head>
<body>
    <h2>Superscript Text Example</h2>

    <!-- Using the <sup> element -->
    <p>This is <sup>superscript text</sup> using the &lt;sup&gt; element.</p>
</body>
</html>Code language: HTML, XML (xml)
```

**Output : **
![](https://blogkhanwaseem.s3.amazonaws.com/uploads/2023/09/19190849/image-174.png)

In this example:

- We have a basic HTML document with a heading (`<h2>`).

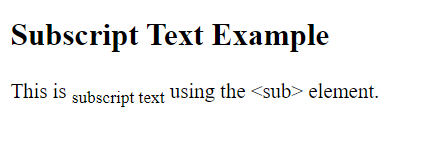
- We use the `<sup>` element to wrap the text that should appear as superscript.

- When you open this HTML file in a web browser, you will see that the text enclosed within the `<sup>` element appears as superscript. Superscript is typically used for mathematical exponents, footnotes, or other content that should appear above the regular baseline of the text.

## Subscript Text :

In HTML, you can create subscript text using the `<sub>` element. Subscript text is typically used for chemical formulas, mathematical expressions, and footnotes where the text should appear slightly below the regular text baseline. Here’s how you can use the `<sub>` element:

```xml
<p>This is regular text with some <sub>subscript</sub> text.</p>Code language: HTML, XML (xml)
```

This example will render as: “This is regular text with some subscript text.”

You can use the `<sub>` element to enclose the text that you want to be subscripted. The default rendering of subscript text may vary slightly between different web browsers and CSS stylesheets, but the `<sub>` element ensures that the text is displayed below the baseline.

**Exmaple : **

```xml
<!DOCTYPE html>
<html>
<head>
    <title>Subscript Text Example</title>
</head>
<body>
    <h2>Subscript Text Example</h2>

    <!-- Using the <sub> element -->
    <p>This is <sub>subscript text</sub> using the &lt;sub&gt; element.</p>
</body>
</html>Code language: HTML, XML (xml)
```

**Output : **
![](https://blogkhanwaseem.s3.amazonaws.com/uploads/2023/09/19193043/image-175.png)

In this example:

- We have a basic HTML document with a heading (`<h2>`).

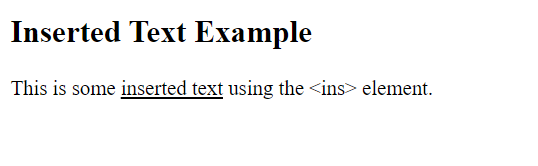
- We use the `<sub>` element to wrap the text that should appear as subscript.

- When you open this HTML file in a web browser, you will see that the text enclosed within the `<sub>` element appears as subscript. Subscript is typically used for chemical formulas, mathematical subscripts, or other content that should appear below the regular baseline of the text.

## Inserted Text :

In HTML, you can indicate inserted text using the `<ins>` element. This element is typically used to mark text that has been added or inserted into a document compared to a previous version. Here’s how you can use the `<ins>` element:

```xml
<p>This is some <ins>inserted text</ins> in HTML.</p>Code language: HTML, XML (xml)
```

This example will render as: “This is some inserted text in HTML.”

You can use the `<ins>` element to enclose the text that you want to mark as inserted. By default, it may be displayed with an underline, but you can customize its appearance using CSS if needed.

**Example : **

```xml
<!DOCTYPE html>
<html>
<head>
    <title>Inserted Text Example</title>
</head>
<body>
    <h2>Inserted Text Example</h2>

    <!-- Using the <ins> element -->
    <p>This is some <ins>inserted text</ins> using the &lt;ins&gt; element.</p>
</body>
</html>Code language: HTML, XML (xml)
```

**Output : **
![](https://blogkhanwaseem.s3.amazonaws.com/uploads/2023/09/19193321/image-177.png)

In this example :

- We have a basic HTML document with a heading (`<h2>`).

- We use the `<ins>` element to wrap the text that represents the inserted content.

- When you open this HTML file in a web browser, you will see that the text enclosed within the `<ins>` element appears with an underline by default. The `<ins>` element is often used to indicate additions or changes in a document, and the underline styling is the default way browsers render it. You can customize the styling of inserted text using CSS if needed.

## Deleted Text :

In HTML, you can indicate deleted or removed text using the `<del>` element. This element is typically used to mark text that has been deleted or struck through in a document compared to a previous version. Here’s how you can use the `<del>` element:

```xml
<p>This is some <del>deleted text</del> in HTML.</p>Code language: HTML, XML (xml)
```

This example will render as: “This is some deleted text in HTML.”

The `<del>` element is often displayed with a strikethrough line to visually represent that the text has been deleted, but the exact rendering can vary depending on the browser and CSS styles applied to the document.

**Example : **

```xml
<!DOCTYPE html>
<html>
<head>
    <title>Deleted Text Example</title>
</head>
<body>
    <h2>Deleted Text Example</h2>

    <!-- Using the <del> element -->
    <p>This is some <del>deleted text</del> using the &lt;del&gt; element.</p>
</body>
</html>Code language: HTML, XML (xml)
```

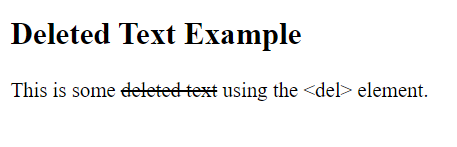
**Output : **

![](https://blogkhanwaseem.s3.amazonaws.com/uploads/2023/09/19193559/image-178.png)

In this example:

- We have a basic HTML document with a heading (`<h2>`).

- We use the `<del>` element to wrap the text that represents the deleted content.

- When you open this HTML file in a web browser, you will see that the text enclosed within the `<del>` element appears with a strikethrough line by default. The `<del>` element is often used to indicate deletions or changes in a document, and the strikethrough styling is the default way browsers render it. You can customize the styling of deleted text using CSS if needed.

## Grouping Content :

In HTML, you can group content together using several elements to create structured and organized sections within a web page. Here are some common HTML elements for grouping content:

- **`<div>` Element**: The `<div>` element is a generic container that is often used to group and structure content for styling purposes. It doesn’t have any inherent styling and is typically styled using CSS.

```xml
   <div>
       <p>This is some content within a div.</p>
       <ul>
           <li>Item 1</li>
           <li>Item 2</li>
       </ul>
   </div>Code language: HTML, XML (xml)
```

- **`<section>` Element**: The `<section>` element is used to define a thematic grouping of content within a document. It helps in structuring a web page and is often used for chapters, articles, or major content sections.

```xml
   <section>
       <h2>About Us</h2>
       <p>We are a company dedicated to...</p>
   </section>Code language: HTML, XML (xml)
```

- **`<article>` Element**: The `<article>` element is used for self-contained content that can be distributed independently and is meaningful on its own. It’s commonly used for blog posts, news articles, or forum posts.

```xml
   <article>
       <h3>Blog Post Title</h3>
       <p>This is the content of the blog post...</p>
   </article>Code language: HTML, XML (xml)
```

- **`<header>` and `<footer>` Elements**: These elements are used to define header and footer sections for content, such as a page header or footer. They are often placed within other elements like `<section>` or `<article>`.

```xml
   <article>
       <header>
           <h3>Article Title</h3>
           <p>Posted on July 1, 2023</p>
       </header>
       <p>This is the article content...</p>
       <footer>
           <p>Author: John Doe</p>
       </footer>
   </article>Code language: HTML, XML (xml)
```

- **`<nav>` Element**: The `<nav>` element is used to define navigation menus, often containing links to different parts of a website. It helps in grouping navigation-related content.

```xml
   <nav>
       <ul>
           <li><a href="/">Home</a></li>
           <li><a href="/about">About Us</a></li>
           <li><a href="/services">Services</a></li>
           <li><a href="/contact">Contact</a></li>
       </ul>
   </nav>Code language: HTML, XML (xml)
```

- **`<aside>` Element**: The `<aside>` element is used for content that is tangentially related to the main content but can be considered separate. It’s often used for sidebars, advertisements, or additional information.

```xml
   <article>
       <h2>Article Title</h2>
       <p>This is the main content of the article...</p>
       <aside>
           <h3>Related Links</h3>
           <ul>
               <li><a href="#">Learn more</a></li>
               <li><a href="#">Related articles</a></li>
           </ul>
       </aside>
   </article>Code language: HTML, XML (xml)
```

These elements help structure and organize content within an HTML document, making it more accessible and meaningful for both users and search engines. Properly grouping content using these elements also improves the overall semantics and readability of a web page.

**Example : **

```xml
<!DOCTYPE html>
<html>
<head>
    <title>Grouping Content Example</title>
</head>
<body>
    <h2>Grouping Content Example</h2>

    <!-- Using <div> for generic content grouping -->
    <div>
        <h3>Section 1</h3>
        <p>This is the content of Section 1.</p>
    </div>

    <!-- Using <section> for thematic grouping -->
    <section>
        <h3>Section 2</h3>
        <p>This is the content of Section 2.</p>
    </section>

    <!-- Using <article> for standalone content -->
    <article>
        <h3>Article 1</h3>
        <p>This is an article with standalone content.</p>
    </article>

    <!-- Using <aside> for side content -->
    <aside>
        <h3>Aside Content</h3>
        <p>This is a side content or sidebar.</p>
    </aside>
</body>
</html>Code language: HTML, XML (xml)
```

**Output : **

![](https://blogkhanwaseem.s3.amazonaws.com/uploads/2023/09/19194339/image-179.png)

In this example:

- We have a basic HTML document with a heading (`<h2>`).

- We use the `<div>` element to group generic content together. `<div>` is often used for styling purposes and for creating generic content containers.

- We use the `<section>` element to group content thematically. It represents a thematic grouping of content, such as chapters or sections of an article.

- We use the `<article>` element to define a standalone piece of content, such as a blog post, news article, or forum post. It can be independently distributed or syndicated.

- We use the `<aside>` element to represent content that is tangentially related to the content around it, such as sidebars or pull quotes.

These elements help organize and structure your HTML document in a way that makes it more accessible and semantically meaningful. It’s important to choose the appropriate element for each type of content to convey the correct meaning to both browsers and assistive technologies.

### Related posts:

[CSS – Text](https://blog.khanwaseem.com/css-text/)
[HTML – Attributes](https://blog.khanwaseem.com/html-attributes/)
[CSS – @ Rules](https://blog.khanwaseem.com/css-rules/)
[CSS – Fonts](https://blog.khanwaseem.com/css-fonts/)

Powered by [YARPP](https://yarpp.com).
