---
title: "Forms and Controlled Components"
url: https://khanwaseem.com/blog/course/forms-and-controlled-components
author: "khan Waseem"
published: 2023-10-26
updated: 2023-10-26
topics: ["course", "React Tutorial"]
description: "Master the art of controlled components in React: Synchronize form inputs with component state for responsive and user-friendly web forms."
---
# Forms and Controlled Components
Forms are an integral part of many web applications, allowing users to input data and interact with the application. In React, managing form inputs and ensuring their synchronization with the component’s state is crucial.
Table of Contents
[Toggle](#)
- [The Importance of Forms](#the-importance-of-forms)[Basic Form Structure](#basic-form-structure)
- [Implementing Controlled Components](#implementing-controlled-components)[Key Concepts](#key-concepts)
- [Example of a Controlled Input](#example-of-a-controlled-input)
- [Common Use Cases and Features](#common-use-cases-and-features)[Handling Multiple Inputs](#handling-multiple-inputs)
- [Select Elements](#select-elements)
- [Checkboxes and Radio Buttons](#checkboxes-and-radio-buttons)
- [Form Validation](#form-validation)
- [Conditional Submit](#conditional-submit)
- [Conclusion](#conclusion)
## The Importance of Forms
Forms serve as a bridge between users and web applications, enabling them to provide input, submit data, and trigger actions. In React, managing forms involves dealing with various input elements like text fields, checkboxes, radio buttons, and select elements. Here, we will focus on text inputs, but the principles discussed apply to other input types as well.
### Basic Form Structure
To create a form in React, you typically start with a `
);
}
export default MyForm;
Code language: HTML, XML (xml)
```
**Output : **
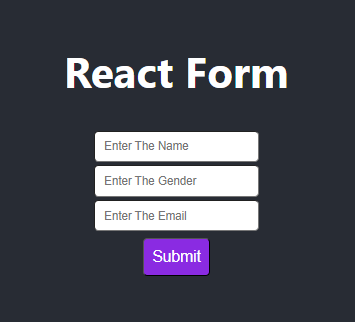
In this functional component, we use the `useState` hook to initialize and manage the **`inputValue` **state. The **`handleInputChange` **and **`handleSubmit` **functions remain almost the same as in the class component, and they are used to handle input changes and form submissions.
## Implementing Controlled Components
Controlled components are a core concept in React when it comes to handling form inputs. A controlled component is an input element whose value is controlled by the state of a React component. This means that the component’s state and the input’s value are in sync, ensuring a single source of truth.
### Key Concepts
To implement a controlled component, you need to follow these key concepts:
- **Initialize State**: Set up the initial state for the form inputs. This is typically done in the component’s constructor or using the `useState` hook in functional components.
- **Value Prop**: Assign the `value` prop of the input element to the corresponding state property. This connects the input element to the component’s state.
- **Change Handler**: Implement a change handler function that updates the state whenever the input value changes.
- **Form Submission**: Handle form submission and process the form data in the `onSubmit` handler.
### Example of a Controlled Input
Let’s take a closer look at the example provided earlier. In this component, the input element is a controlled component. The `value` prop of the input is set to `**inputValue**`, which is the component’s state property that holds the input’s value.
```xml
Code language: HTML, XML (xml)
```
The **`onChange` **event handler, `**handleInputChange**`, is responsible for updating the component’s state whenever the user types into the input field.
```xml
const handleInputChange = (event) => {
setInputValue(event.target.value);
};Code language: HTML, XML (xml)
```
By connecting the input’s `value` prop to the component’s state and providing an `onChange` handler, we ensure that the input is a controlled component. Any change in the input field will trigger the `handleInputChange` function, which updates the component’s state, keeping the input and state synchronized.
## Common Use Cases and Features
Now that you understand the fundamentals of controlled components, let’s explore some common use cases and features when working with forms in React.
### Handling Multiple Inputs
Forms often consist of multiple input elements. To handle this scenario, you can create a controlled component for each input and manage their values individually in the component’s state.
```xml
import React, { useState } from 'react'
const Form1 = () => {
const [userName,setUserName] = useState('');
const [password,setpassword] = useState('');
const handleUsernameChange = (e) =>{
setUserName(e.target.value)
}
const handlePasswordChange = (e) =>{
setpassword(e.target.value);
}
return (
)
}
export default Form1;Code language: HTML, XML (xml)
```
### Select Elements
For select elements, you can use the same controlled component approach. Set the `value` prop of the `